
Have you ever wondered if gluten free desserts can truly rival traditional treats in terms of flavor and texture? Gluten free cupcakes, once considered a niche option, have now taken the world by storm, becoming the go-to dessert for all occasions. But what makes these gluten free cupcakes so special? Is it just the dietary benefit, or do they offer something more? In this blog post, we’ll uncover why gluten free cupcakes are the best treat for any event, whether you’re baking for a birthday party, a family gathering, or simply indulging in a sweet moment alone.
Table of Contents
When you think of cupcakes, you might imagine fluffy, light treats with a melt-in-your-mouth quality. Gluten free cupcakes can deliver exactly that — and much more. With the rise in demand for gluten free options, they have become a popular dessert choice for those with celiac disease, gluten sensitivity, or anyone simply looking to make healthier dessert choices. If you enjoy baking other gluten free treats, like Cottage Cheese Blueberry Muffins or Gluten Free Banana Muffins, you’ll love these cupcakes as a versatile option. For a savory twist, try the decadent Peanut Butter Cream Cheese recipe alongside these cupcakes for a delightful variety of flavors!
Ingredients List
One of the best parts of baking gluten free cupcakes is the versatility of ingredients you can use. The beauty of gluten free baking lies in the wide array of options available to ensure your cupcakes are both delicious and free from gluten. Here’s a breakdown of the essential ingredients to create these light, fluffy treats:

Key Ingredients for Gluten Free Cupcakes:
- Gluten Free Flour Blend
This is the foundation of your gluten free cupcakes. A blend of rice flour, potato starch, and tapioca flour works well, but you can also opt for pre-mixed gluten free flours available in stores. Make sure you choose a blend designed specifically for baking, as this will provide the best results for texture and consistency. - Baking Powder
To ensure your cupcakes rise beautifully, you’ll need gluten free baking powder. This will help your cupcakes achieve a light and airy texture, just like traditional cupcakes. - Granulated Sugar
Sweeten your gluten free cupcakes with granulated sugar or a sugar substitute like coconut sugar if you prefer a healthier option. Coconut sugar adds a hint of caramel flavor, giving the cupcakes an extra layer of depth. - Butter or Oil
For richness and moisture, you can use butter or vegetable oil. Butter offers a lovely flavor, while vegetable oil ensures the cupcakes stay moist without overpowering other flavors. - Eggs
Eggs are crucial for binding your ingredients together and providing structure to your cupcakes. If you’re looking for a vegan alternative, you can use flax eggs or aquafaba (the liquid from canned chickpeas) to achieve the same binding effect. - Vanilla Extract
A dash of pure vanilla extract is essential for that comforting, aromatic flavor that enhances the overall taste of your gluten free cupcakes. - Milk or Dairy-Free Milk
Traditional cupcakes use regular milk, but you can substitute this with almond milk, oat milk, or coconut milk if you’re aiming for a dairy-free option. Each of these choices will add a slightly different flavor profile, so choose the one that best complements the rest of the ingredients. - Salt
A pinch of salt brings out the sweetness and balances the flavors. It’s an essential component that helps to elevate the overall taste of the cupcakes.
Possible Ingredient Substitutions:
- Gluten Free Flour: If you don’t have a pre-made gluten free flour blend, you can mix your own by combining rice flour, potato starch, and cornstarch in a 2:2:1 ratio.
- Butter: Coconut oil is a great dairy-free substitute, and it adds a subtle coconut flavor.
- Sugar: For a healthier twist, swap granulated sugar for a natural sweetener like maple syrup or honey. Just be sure to adjust the liquid ratios in the recipe.
By using these ingredients, you’ll be able to create cupcakes that are not only gluten free but also rich in flavor and texture, proving that dietary restrictions don’t have to mean sacrificing deliciousness.
Timing
Baking gluten free cupcakes is an easy and relatively quick process that allows you to prepare these treats even if you’re short on time. Below is a breakdown of the preparation and cooking time involved:
Preparation Time:
Preparing the ingredients and mixing the batter takes about 10 to 15 minutes. This is a reasonable timeframe, especially since gluten free baking tends to be more straightforward than other specialized baking techniques. For the best results, make sure you mix your dry ingredients well before incorporating your wet ingredients.
Cooking Time:
The baking process for gluten free cupcakes generally takes 18 to 22 minutes at 350°F (175°C). Since gluten free batters tend to have a slightly different moisture content compared to traditional cupcakes, it’s important to keep an eye on the cupcakes as they bake. You can check for doneness by inserting a toothpick into the center of a cupcake; it should come out clean when they are done.
Total Time:
From start to finish, making gluten free cupcakes takes about 30 to 40 minutes. Compared to traditional recipes, this is a quick process, as there’s no need to allow the batter to rise for an extended period. Plus, since gluten free cupcakes require less prep time, you can easily bake a fresh batch during a busy week or even as a last-minute treat for a special occasion.
Quick Tip: Allow the cupcakes to cool completely before decorating or serving them, as this ensures the frosting won’t melt. This can take an additional 10-15 minutes.
Step-by-Step Instructions
Baking gluten free cupcakes is a fun and rewarding experience. With just a few simple steps, you can create delicious treats that everyone will love. Follow these instructions closely for a perfect batch of gluten free cupcakes!

Step 1: Preheat Your Oven and Prepare Your Cupcake Tin
Before starting, preheat your oven to 350°F (175°C). This is an important step to ensure that your cupcakes bake evenly. While the oven heats up, line a 12-cup muffin tin with cupcake liners. This will prevent the cupcakes from sticking and make cleanup a breeze!
Tip: For extra flavor, try using colorful liners that match the occasion — they’ll make your cupcakes look as good as they taste!
Step 2: Mix the Dry Ingredients
In a large mixing bowl, whisk together your gluten free flour blend, baking powder, salt, and granulated sugar. Make sure these ingredients are evenly distributed. This step helps to create a smooth batter and ensures your cupcakes rise evenly.
Tip: Sift the flour if you prefer a lighter texture for your cupcakes. It removes any lumps and ensures an even distribution of ingredients.
Step 3: Combine the Wet Ingredients
In a separate bowl, beat your eggs (or flax eggs for a vegan version) and add the milk (or dairy-free milk), vanilla extract, and melted butter (or coconut oil). Whisk everything together until well combined.
Tip: If you’re using dairy-free milk, coconut milk adds a rich, creamy flavor that works wonderfully in this recipe.
Step 4: Add the Wet Ingredients to the Dry Ingredients
careful not to overmix, as this could make the cupcakes dense.
Tip: If the batter feels too thick, add a tablespoon of milk at a time until you reach the desired consistency. Gluten free batters tend to be slightly thicker than regular batters.
Step 5: Fill the Cupcake Liners
Spoon the cupcake batter evenly into the prepared cupcake liners.
Tip: For uniform cupcake sizes, use an ice cream scoop or a cookie scoop to ensure each cupcake gets the same amount of batter.
Step 6: Bake the Cupcakes
Place the cupcake tin in the oven and bake for 18 to 22 minutes.
Tip: If you’re baking a double batch or using a larger cupcake tin, you may need to adjust the baking time slightly.
Step 7: Cool the Cupcakes
Once baked, remove the cupcakes from the oven and allow them to cool in the tin for about 10 minutes. After that, transfer them to a wire rack to cool completely before frosting.
Tip: If you’re in a rush, place the cupcakes in the fridge for a quick cool-down. Just make sure they’re completely cool before frosting to avoid melting the icing.
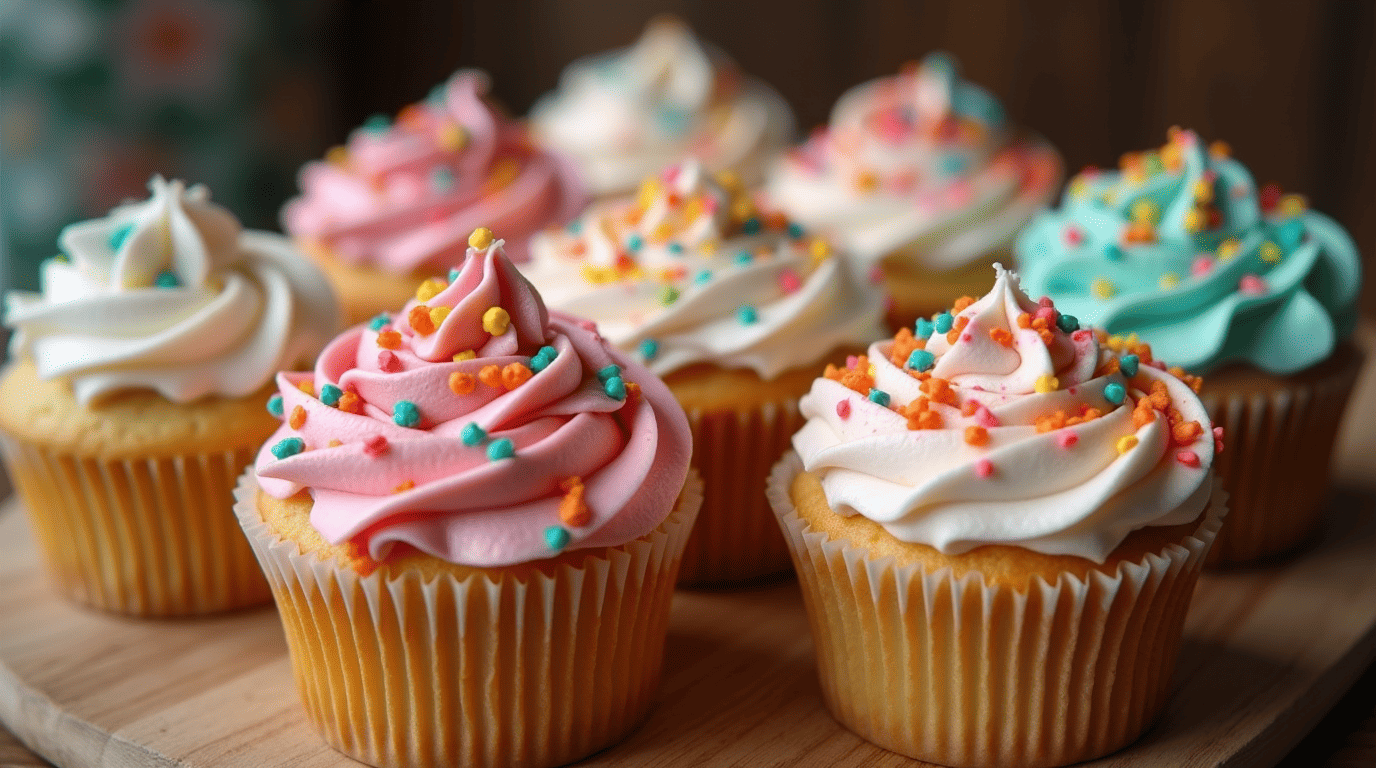
Step 8: Frost and Decorate
Now, it’s time for the fun part — frosting your cupcakes! Use your favorite frosting (buttercream, cream cheese, or dairy-free options), and decorate with sprinkles, fruit, or even a dusting of powdered sugar.
Tip: For a special touch, try using a piping bag with a decorative tip to create professional-looking swirls or rosettes.
Nutritional Information
These gluten free cupcakes are not only delicious but also packed with nutrients that can cater to various dietary needs. Here’s a detailed look at the nutritional breakdown of a standard gluten free cupcakes (without frosting):
- Calories: 200 kcal
- Carbohydrates: 30g
- Sugars: 18g
- Fiber: 1g
- Sugars: 18g
- Protein: 2g
- Fat: 9g
- Saturated Fat: 4g
- Unsaturated Fat: 5g
- Saturated Fat: 4g
- Cholesterol: 30mg
- Sodium: 150mg
- Calcium: 15mg
- Iron: 1.5mg
While these cupcakes are not considered “low-calorie,” they are a great option for those with gluten sensitivities, offering a sweet indulgence without the gluten. You can further tweak the recipe to match your specific nutritional needs — more on that in the next section!
Healthier Alternatives for gluten free cupcakes Recipe
While gluten free cupcakes are already a healthier option for people with gluten sensitivities, there are several ways to make them even more nutritious. Here are some creative ingredient swaps that can elevate your cupcakes without sacrificing flavor:
1. Sugar Alternatives
To reduce the sugar content, swap out regular granulated sugar for a natural sweetener like Stevia, Erythritol, or Maple Syrup. This will lower the glycemic index of your cupcakes and make them more diabetic-friendly.
- Maple syrup adds a rich, caramel flavor.
- Erythritol or Stevia are great low-calorie options that won’t spike your blood sugar.
2. Use Almond Flour or Coconut Flour
Instead of a gluten free flour blend, consider using almond flour or coconut flour for a more protein-packed, nutrient-dense cupcake. These flours are naturally gluten free, high in healthy fats, and lower in carbs, making them ideal for a low-carb or ketogenic diet.
- Almond flour: Adds moisture and a nutty flavor.
- Coconut flour: Absorbs more liquid, so you’ll need to adjust the liquids in the recipe if you use this flour.
3. Dairy-Free and Egg-Free Options
To make the cupcakes dairy-free and egg-free, simply replace butter with coconut oil or vegan butter. You can also use flax eggs (1 tablespoon flaxseed meal mixed with 3 tablespoons water, set aside for 5 minutes) or aquafaba (chickpea brine) instead of regular eggs.
4. Increase Fiber
Adding a scoop of chia seeds, flaxseeds, or ground oats into the batter can increase the fiber content of your cupcakes. These ingredients are full of heart-healthy omega-3s and will also help regulate blood sugar levels.
Serving Suggestions
Now that you’ve baked your delicious gluten free cupcakes, it’s time to serve them in style! Whether you’re making these for a party or a simple afternoon snack, here are some creative ways to serve and present them:
1. Cupcake Platters
For a visually stunning display, arrange the cupcakes on a decorative platter. Add colorful liners or festive decorations like edible glitter, sprinkles, or fresh fruit (think raspberries, blueberries, or even a light dusting of powdered sugar) for a touch of elegance.
Tip: For a more sophisticated presentation, add a few flowers to the platter or a decorative cake stand.
2. Cupcake Bar
If you’re hosting a party or event, set up a cupcake bar where guests can frost their cupcakes themselves. Offer a variety of toppings such as chocolate chips, crushed nuts, coconut flakes, and flavored frostings (vanilla, chocolate, strawberry, etc.). This adds an interactive element and lets everyone customize their cupcake to their liking!
3. Pair with Beverages
Pair your cupcakes with drinks to elevate the experience. Gluten free cupcakes go wonderfully with a cup of coffee, a pot of tea, or even a glass of dairy-free milk. For a special occasion, consider pairing the cupcakes with a glass of champagne or sparkling water for a refreshing contrast.
Common Mistakes to Avoid
Baking gluten free cupcakes might seem straightforward, but there are a few common pitfalls that can prevent your cupcakes from turning out perfectly. Below, we highlight these mistakes and provide actionable tips to help you avoid them.
1. Overmixing the Batter
One of the most common mistakes in baking gluten free cupcakes is overmixing the batter. Gluten free flour blends often have different textures compared to wheat flour, and overmixing can result in dense, rubbery cupcakes. The key is to mix just until combined and avoid beating the batter for too long.
Tip: Gently fold the wet ingredients into the dry ingredients until just incorporated. If you notice lumps, it’s okay — just don’t overwork the batter.
2. Incorrect Oven Temperature
Every oven is different, and sometimes the temperature may be off, causing cupcakes to bake unevenly. If your oven runs too hot or too cool, you might end up with burnt edges or undercooked centers.
Tip: Use an oven thermometer to ensure your oven is at the correct temperature. If needed, adjust your baking time slightly, but be sure to check your cupcakes frequently after 18 minutes.
3. Using the Wrong Type of Gluten Free Flour
Not all gluten free flour blends are created equal. Some flour blends work better for certain types of baked goods than others. Using a flour blend not designed for cupcakes might result in a dry or crumbly texture.
Tip: Always use a gluten free flour blend that’s specifically designed for baking cupcakes or cakes. Read the package label for instructions and intended use.
4. Not Letting the Cupcakes Cool Completely Before Frosting
Patience is key when decorating cupcakes. If you frost your cupcakes while they are still warm, the frosting will melt and run off, leaving a mess.
Tip: Allow your cupcakes to cool completely on a wire rack before applying any frosting or decorations. This step ensures the frosting stays intact and gives you a beautiful finish.
5. Not Accounting for Altitude or Humidity
Baking at higher altitudes or in humid conditions can affect your cupcakes’ texture and rise. The air pressure and moisture content in the environment can change how your cupcakes bake.
Tip: If you live at a higher altitude, try reducing the baking powder by about 1/8 teaspoon and increasing the liquid slightly. For humid weather, consider adding a little extra flour to help balance the moisture.
Storing Tips for gluten free cupcakes Recipe
To ensure your gluten free cupcakes stay fresh and flavorful for as long as possible, proper storage is essential. Here are a few tips to keep your cupcakes at their best:
1. Storing Leftover Cupcakes
After baking and cooling your cupcakes, store them in an airtight container at room temperature for up to 3 days. This will help preserve their moisture and texture without them becoming too dry.
Tip: If you plan to keep them for longer than 3 days, store them in the fridge for up to 1 week. Just be sure to bring them back to room temperature before serving for the best taste and texture.
2. Freezing Gluten Free Cupcakes
To extend the shelf life of your cupcakes, you can freeze them. Wrap each cupcake individually in plastic wrap, and then place them in an airtight container or freezer-safe bag. You can freeze them for up to 3 months.
Tip: To thaw frozen cupcakes, simply leave them on the counter for 30 minutes. If you’re in a rush, pop them in the microwave for 10-15 seconds to warm them up.
3. Storing Frosted Cupcakes
If you’ve already frosted your cupcakes, storing them requires a bit more attention. Place the cupcakes in a single layer in an airtight container. To avoid disturbing the frosting, try placing parchment paper between layers if stacking them.
Tip: If you have a lot of frosted cupcakes, place the container in the fridge for longer shelf life. Frosting may harden a little when refrigerated, but it will soften once the cupcakes reach room temperature again.
4. Prepping Ingredients Ahead of Time
If you want to streamline your baking process, you can prepare the dry ingredients ahead of time. Mix your gluten free flour, sugar, baking powder, and salt together and store in an airtight container for up to 1 week. When you’re ready to bake, simply add your wet ingredients and follow the steps.
Tip: You can also pre-measure the wet ingredients, but only mix them just before baking to avoid any separation.
Conclusion
Gluten free cupcakes are the ultimate treat for anyone looking for a sweet indulgence without compromising on taste or dietary needs. With the right ingredients and a little patience, you can create light, fluffy, and irresistible cupcakes that will impress everyone at your next event.
Whether you’re making them for a special occasion or just a casual afternoon snack, these cupcakes offer a healthier alternative without sacrificing flavor. So why not try baking a batch today and let us know how it turns out? Don’t forget to share your thoughts and experiences in the comments below, and subscribe for more delicious gluten free recipes and tips!
FAQs
1. Can I make these gluten free cupcakes vegan?
Yes! Simply substitute eggs with flax eggs or aquafaba, and use dairy-free butter and milk. These substitutions won’t affect the overall flavor or texture of your cupcakes.
2. How do I know when the cupcakes are done baking?
The best way to test for doneness is by inserting a toothpick into the center of a cupcake. You can also gently touch the tops of the cupcakes – they should bounce back when done.
3. Can I use almond flour instead of gluten free flour blend?
Yes, you can use almond flour, but keep in mind that it has a denser texture. You may need to adjust the amount of liquid in the recipe, as almond flour absorbs more moisture than gluten free blends.
4. How long can I store gluten free cupcakes?
At room temperature, gluten free cupcakes stay fresh for up to 3 days. For longer storage, freeze them for up to 3 months, or refrigerate for up to 1 week. Just make sure to allow them to come to room temperature before serving.
5. Can I use a different type of frosting for gluten free cupcakes?
Absolutely! You can use buttercream, cream cheese frosting, or even a dairy-free frosting made from coconut cream. Each will pair beautifully with the gluten free cupcakes base.

Delicious Gluten Free Cupcakes
Equipment
- Mixing Bowls
- Whisk
- Muffin Tin
- Cupcake Liners
- Oven
Ingredients
Dry Ingredients
- 1 1/2 cups Gluten-Free Flour Blend
- 1 1/2 tsp Baking Powder
- 1/4 tsp Salt
- 3/4 cup Granulated Sugar
Wet Ingredients
- 1/2 cup Butter or Oil Melted
- 2 Eggs
- 1 tsp Vanilla Extract
- 1/2 cup Milk or Dairy-Free Milk
Instructions
- Preheat the oven to 350°F (175°C) and line a muffin tin with cupcake liners.
- In a bowl, whisk together gluten-free flour, baking powder, salt, and sugar.
- In a separate bowl, mix melted butter (or oil), eggs, vanilla extract, and milk.
- Gradually combine the wet ingredients with the dry ingredients, stirring gently.
- Divide the batter evenly among the cupcake liners.
- Bake for 18-22 minutes or until a toothpick inserted comes out clean.
- Let the cupcakes cool in the tin for 10 minutes before transferring to a wire rack.
- Once cooled, frost with your favorite icing and enjoy!
1 thought on “Why Gluten Free Cupcakes Are the Best Treat for Every Occasion”
Comments are closed.