
Table of Contents
Remember that distinctive orange box in your lunchbox? That satisfying cheese cracker crunch that made snack time something to look forward to? For those of us navigating the gluten-free lifestyle, those simple pleasures often become distant memories. I still recall the day my doctor confirmed my celiac diagnosis—my mind immediately raced to all the comfort foods I’d have to say goodbye to. Cheez-Its were at the top of that mental list.
After weeks of feeling sorry for myself (and one particularly low moment where I almost caved and ate a handful of the wheat-filled originals), I decided to take matters into my own hands. Why should going gluten-free mean giving up the flavors that bring us joy?
That’s when my Gluten Free Cheez Its mission began. Not just any substitute would do—I wanted that same satisfying snap, that bold cheesy flavor, and that nostalgic feeling, all without the gluten that my body couldn’t tolerate.
Five batches, three cheese varieties, and countless taste tests later, I’ve finally created gluten free Cheez Its that not only remind me of the original but might—dare I say—be even better. These homemade gluten free Cheez Its have become a staple in my household, and friends who don’t even follow a gluten-free diet request them regularly.
What makes these gluten free Cheez Its special isn’t just their incredible flavor—it’s how surprisingly simple they are to make. No complicated techniques or hard-to-find ingredients. Just five straightforward steps stand between you and that cheesy, crispy goodness you’ve been craving.
Whether you’re newly diagnosed with celiac disease, have been gluten-free for years, or are simply looking to expand your snack repertoire, these homemade gluten free Cheez Its are about to become your new favorite kitchen project. And if you’re enjoying this recipe, be sure to check out my other gluten-free favorites like Gluten Free Banana Muffins, Gluten Free Bagels, and even my surprisingly simple Gluten Free Phyllo Dough recipe!
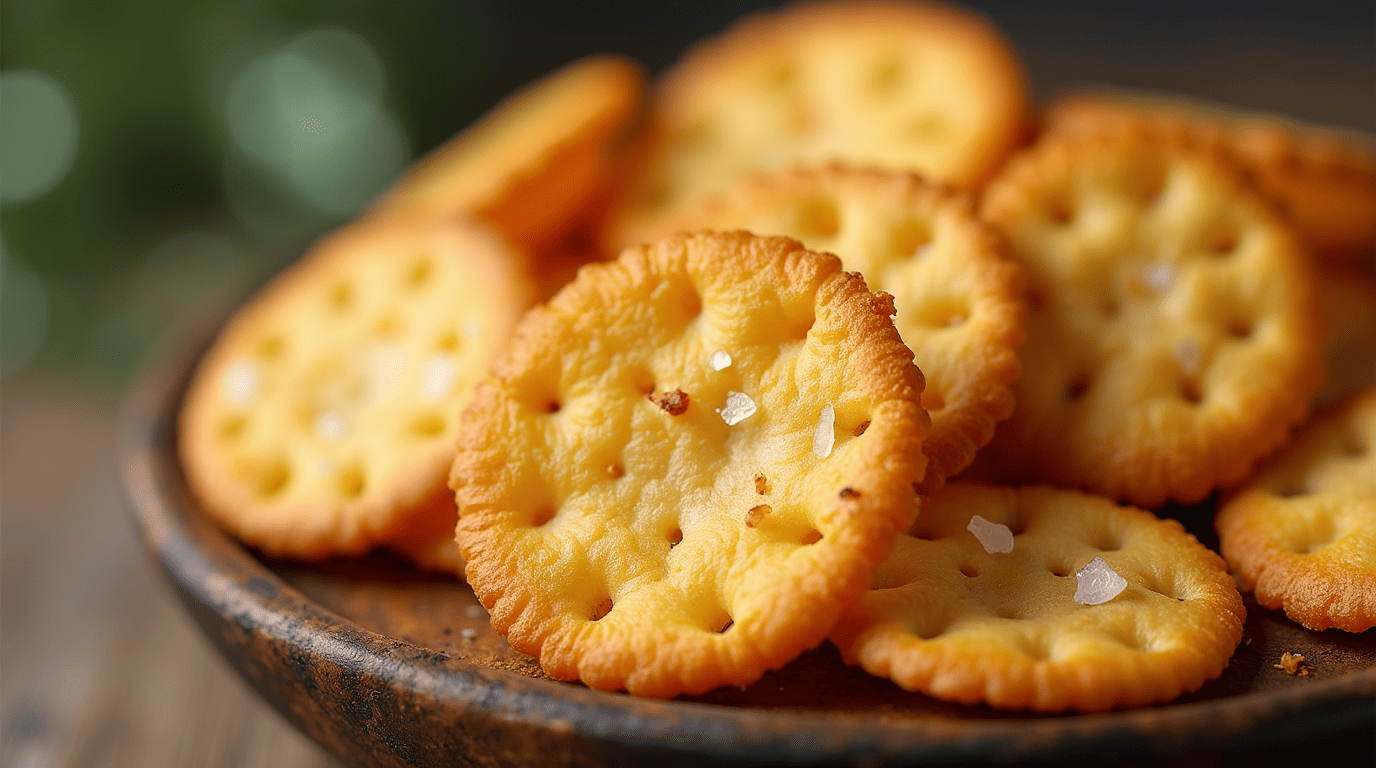
Why These Gluten Free Cheez Its Will Change Your Snack Game
- Authentically Cheesy – Using sharp cheddar and a touch of nutritional yeast creates that iconic cheesy flavor that rivals the original Cheez-Its.
- Perfect Crunch Factor – The specific baking technique ensures these gluten free Cheez Its have that satisfying snap—not too hard, not too soft.
- Simple Ingredients – No preservatives, artificial colors, or mystery ingredients.
- Customize Your Flavors – Once you master the base recipe, the variations are endless! Try pepper jack for a spicy kick or add ranch seasoning for a tangy twist.
- Freezer-Friendly Dough – Make a double batch of dough and freeze half for later, so you’re always just 15 minutes away from fresh gluten free Cheez Its.
- Kid-Approved – These crackers have passed the ultimate test—picky eaters who can’t tell the difference between these and the store-bought version.
- Budget-Friendly – Store-bought gluten-free snacks can be expensive! These homemade gluten free Cheez Its cost a fraction of the boxed alternatives.
- No Special Equipment Needed – A basic rolling pin and a pizza cutter are all you need to create these perfectly shaped crackers.
Ingredients Breakdown & Substitutions
Understanding each ingredient’s purpose helps you make the best gluten free Cheez Its possible and allows for smart substitutions based on your dietary needs or what’s in your pantry.

| Ingredient | Why It’s Important | Substitutions |
| Gluten-Free Flour | Ensures crispy texture without gluten | Almond flour or coconut flour for keto-friendly option |
| Cheddar Cheese | Provides the classic cheesy flavor | Vegan cheese for dairy-free or nutritional yeast for vegan option |
| Butter | Adds richness and crispiness | Dairy-free butter alternative or coconut oil |
| Salt | Enhances flavor | Sea salt or Himalayan salt |
| Baking Powder | Helps crackers puff slightly and crisp evenly | Baking soda with cream of tartar as a homemade alternative |
| Spices (optional) | Customizes flavor profile | Paprika, garlic powder, onion powder, or your preferred spice blend |
The beauty of these gluten free Cheez Its is their versatility. While the classic recipe delivers that nostalgic flavor, don’t be afraid to experiment with different cheeses or seasoning blends to create your perfect snack.
For those with multiple dietary restrictions, rest assured that these gluten free Cheez Its can be adapted to accommodate most needs without sacrificing that irresistible cheesy crunch. The dairy-free and vegan options still deliver impressive results that will satisfy your cracker cravings.
Step-by-Step Instructions with Expert Tips
Making gluten free Cheez Its at home is surprisingly simple. Follow these five easy steps for crispy, cheesy perfection every time:

Combine Ingredients
In a large mixing bowl, blend gluten-free flour, shredded cheddar cheese, softened butter, salt, and baking powder. Mix until a uniform dough forms.
Expert Tip: If the dough is too crumbly, add 1-2 tablespoons of cold water. The perfect dough should hold together when pressed but shouldn’t be sticky.
For the cheesiest flavor, use extra-sharp aged cheddar and grate it yourself rather than using pre-shredded cheese. The anti-caking agents in pre-shredded cheese can affect both flavor and texture of your gluten free Cheez Its.
Roll the Dough
Place dough between two sheets of parchment paper. Roll out to about 1/8-inch thickness for perfect crispiness.
Expert Tip: Keep thickness even to ensure uniform baking. If some areas are thicker than others, your gluten free Cheez Its will bake unevenly.
The parchment paper method eliminates the need for additional flour during rolling, which can dry out your dough and alter the texture of your finished crackers.
Cut into Shapes
Use a pizza cutter or knife to cut dough into small squares (approximately 1 inch each). Make small holes in the center with a fork or toothpick to replicate the authentic Cheez Its look.
Expert Tip: This also helps prevent air bubbles and ensures even baking.
For extra precision, you can use a ruler as a guide when cutting your gluten free Cheez Its. The more uniform your crackers, the more professional-looking your final product will be.
Bake to Perfection
Transfer crackers on parchment paper to a baking sheet. Bake at 350°F (175°C) for 12-15 minutes or until edges become golden brown.
Expert Tip: Watch closely to avoid burning. Gluten free Cheez Its can go from perfectly crisp to overdone very quickly.
For the best results, rotate your baking sheet halfway through cooking time. This ensures all your gluten free Cheez Its bake evenly, regardless of hot spots in your oven.
Cool and Enjoy
Remove crackers from oven and allow to cool on baking sheet for 5 minutes, then transfer to a wire rack. Let cool completely for maximum crispness.
Expert Tip: Store in an airtight container to keep freshness. These gluten free Cheez Its will maintain their crispness for up to one week.
The cooling process is crucial for developing that signature Cheez Its snap. Your gluten free Cheez Its will continue to crisp up as they cool, so resist the temptation to judge their texture straight from the oven.
Storage, Make-Ahead, & Freezing Tips
Proper storage is key to maintaining the perfect crunch of your gluten free Cheez Its. Here’s how to keep them fresh or prepare them ahead of time:
Storage Duration Guidelines
Counter Storage: Store in an airtight container at room temperature for up to 1 week. Adding a small piece of paper towel helps absorb excess moisture and keeps gluten free Cheez Its crispy longer.
Refrigerator Storage: Not recommended as the moisture in the refrigerator can make your gluten free Cheez Its soggy.
Freezer (Baked Crackers): Place completely cooled gluten free Cheez Its in a freezer-safe container with parchment paper between layers. Freeze for up to 3 months.
Freezer (Dough): Wrap dough tightly in plastic wrap, then place in a freezer bag. Freeze for up to 2 months. Thaw overnight in the refrigerator before rolling and baking.
Best Refreshing Methods
If your gluten free Cheez Its begin to lose their crispness, simply place them on a baking sheet and reheat at 250°F (120°C) for 5-7 minutes. Allow to cool completely before returning to an airtight container.
For frozen baked crackers, thaw at room temperature for 30 minutes, then crisp up in a 250°F (120°C) oven for 5-10 minutes.
Creative Ways to Use “Day-Old” Gluten Free Cheez Its
- Salad Toppers: Crumble slightly softened gluten free Cheez Its over salads as a gluten-free alternative to croutons.
- Soup Garnish: Float a few on top of tomato soup for a fun, cheesy addition.
- Savory Crumb Coating: Pulse in a food processor to create a cheesy coating for chicken tenders or fish fillets.
- Cheesy Breadcrumbs: Crush and mix with herbs to top gluten-free mac and cheese before baking.
Creative Variations & Serving Ideas
Once you’ve mastered the basic gluten free Cheez Its recipe, it’s time to get creative! Here are some delicious variations and serving suggestions:
Flavor Variations
- Ranch Gluten Free Cheez Its: Add 2 tablespoons of ranch seasoning mix to your dough for tangy, herbaceous crackers.
- Spicy Pepper Jack: Substitute the cheddar with pepper jack cheese and add a pinch of cayenne for heat-lovers.
- Everything Bagel: Sprinkle everything bagel seasoning on top before baking for an onion-garlic punch.
- Rosemary Parmesan: Replace half the cheddar with parmesan and add 1 tablespoon of finely chopped fresh rosemary for an elevated snack perfect for wine nights.
- Nacho Cheese: Add a tablespoon of nutritional yeast and ¼ teaspoon of paprika for a bold nacho cheese flavor.
Serving Suggestions
- Cheese Board Companion: Arrange your homemade gluten free Cheez Its on a cheese board alongside gluten-free charcuterie, fruits, and nuts.
- Soup Sidekick: Serve alongside tomato soup or gluten-free chili instead of traditional crackers.
- Dip Delivery System: These sturdy crackers are perfect for scooping up hummus, spinach artichoke dip, or your favorite gluten-free dip.
- Lunchbox Star: Pack in school or work lunches for a homemade treat that’s far healthier than store-bought alternatives.
- Party Mix: Combine with gluten-free pretzels, nuts, and dried fruit for a custom party mix that’s safe for everyone to enjoy.
Nutritional Value

Understanding the nutritional profile of your homemade gluten free Cheez Its can help you make informed choices about how they fit into your overall diet. Here’s a breakdown of what you can expect per serving (approximately 20 crackers):
Nutrition Facts (Per Serving)
- Calories: 140-160 calories
- Protein: 3-4g
- Carbohydrates: 12-14g
- Fiber: 0.5-1g (varies based on flour choice)
- Sugar: 0-1g
- Fat: 9-11g
- Saturated Fat: 5-6g
- Cholesterol: 25-30mg
- Sodium: 180-200mg
Nutritional Benefits of Homemade Gluten Free Cheez Its
Compared to store-bought gluten-free crackers, these homemade gluten free Cheez Its offer several nutritional advantages:
- No Artificial Preservatives: Commercial products often contain preservatives to extend shelf life. Your homemade version is preservative-free.
- Lower Sodium Option: You control the salt content, making it easy to create a lower-sodium alternative if needed.
- Real Cheese: Many commercial products use cheese flavoring rather than real cheese. Your homemade gluten free Cheez Its contain actual cheese with its beneficial calcium and protein.
- Customizable for Dietary Needs: By choosing alternative flours or dairy-free substitutions, you can adjust the nutritional profile to match specific dietary requirements.
- Portion Control: Making your own crackers helps you become more mindful of portion sizes and what goes into your snacks.
For those following specific diets, note that these gluten free Cheez Its can fit into a keto or low-carb eating plan when made with almond flour instead of traditional gluten-free flour blends.
Expert Tips & FAQs
After testing this recipe countless times, I’ve compiled my top tips for foolproof gluten free Cheez Its and answers to the most common questions:
Pro Tips for Perfect Gluten Free Cheez Its
- Quality Matters: Use the highest quality cheese you can afford. A good aged cheddar will elevate the flavor significantly.
- Proper Temperature: All ingredients should be at room temperature for the best dough consistency.
- Chill Your Dough: If you find the dough difficult to work with, chill it for 20-30 minutes before rolling out.
- Uniform Thickness: Use rolling pin rings or guide sticks to ensure even thickness throughout.
- Salt Timing: For extra flavor, sprinkle a tiny bit of salt on top just before baking.
- Test Batch: Bake a small test batch of 4-5 crackers first to perfect your timing before committing the entire batch to the oven.
Frequently Asked Questions
Why are my gluten free Cheez Its soft instead of crispy?
This usually happens when the crackers are too thick or underbaked. Ensure you’re rolling the dough to 1/8-inch thickness and baking until the edges are golden brown. Remember that they continue to crisp as they cool, so let them cool completely before judging the final texture.
Can I make these without dairy?
Absolutely! Use a dairy-free butter alternative and vegan cheese shreds. You may need to add a bit more nutritional yeast (1-2 tablespoons) to boost the cheesy flavor. The texture may be slightly different, but they’ll still be delicious.
What’s the best gluten-free flour to use?
A cup-for-cup gluten-free flour blend that contains xanthan gum works best for maintaining the classic texture. Bob’s Red Mill 1-to-1 or King Arthur Measure for Measure are excellent options. If using a blend without xanthan gum, add 1/4 teaspoon per cup of flour.
My dough is too crumbly. What went wrong?
Gluten-free doughs tend to be drier than traditional doughs. Add cold water, one tablespoon at a time, until the dough comes together. Different brands of gluten-free flour absorb moisture differently, so you may need to adjust accordingly.
Can I double the recipe?
Yes! This recipe doubles beautifully. Work with half the dough at a time for easier handling, keeping the unused portion wrapped to prevent drying.
Conclusion
There you have it—delicious, crispy, cheesy gluten free Cheez Its that rival the original childhood favorite! In just five simple steps, you’ve created a snack that proves going gluten-free doesn’t mean giving up the flavors you love.
What I find most rewarding about this recipe is how it transforms something that’s typically off-limits into an accessible, even better alternative. These homemade crackers have become a staple in my gluten-free kitchen arsenal, perfect for everything from everyday snacking to special gatherings where I want to ensure everyone can enjoy the same delicious treats.

Gluten Free Cheez Its
Equipment
- Rolling Pin
- Pizza Cutter
- Baking Sheet
Ingredients
Cracker Dough
- 1 cup gluten-free flour blend with xanthan gum
- 1 cup shredded sharp cheddar cheese grate fresh for best results
- 4 tbsp butter softened
- 1/2 tsp salt adjust to taste
- 1/2 tsp baking powder
- 2 tbsp cold water as needed for dough consistency
Instructions
- In a large bowl, mix gluten-free flour, shredded cheese, butter, salt, and baking powder until a crumbly dough forms.
- Add cold water, one tablespoon at a time, until dough holds together without being sticky.
- Roll dough between parchment paper to 1/8-inch thickness.
- Cut into small squares using a pizza cutter and poke holes in the center with a toothpick.
- Transfer to a baking sheet and bake at 350°F (175°C) for 12-15 minutes until golden brown.
- Let cool for 5 minutes on the baking sheet, then transfer to a wire rack to crisp up.