

Table of Contents
Introduction
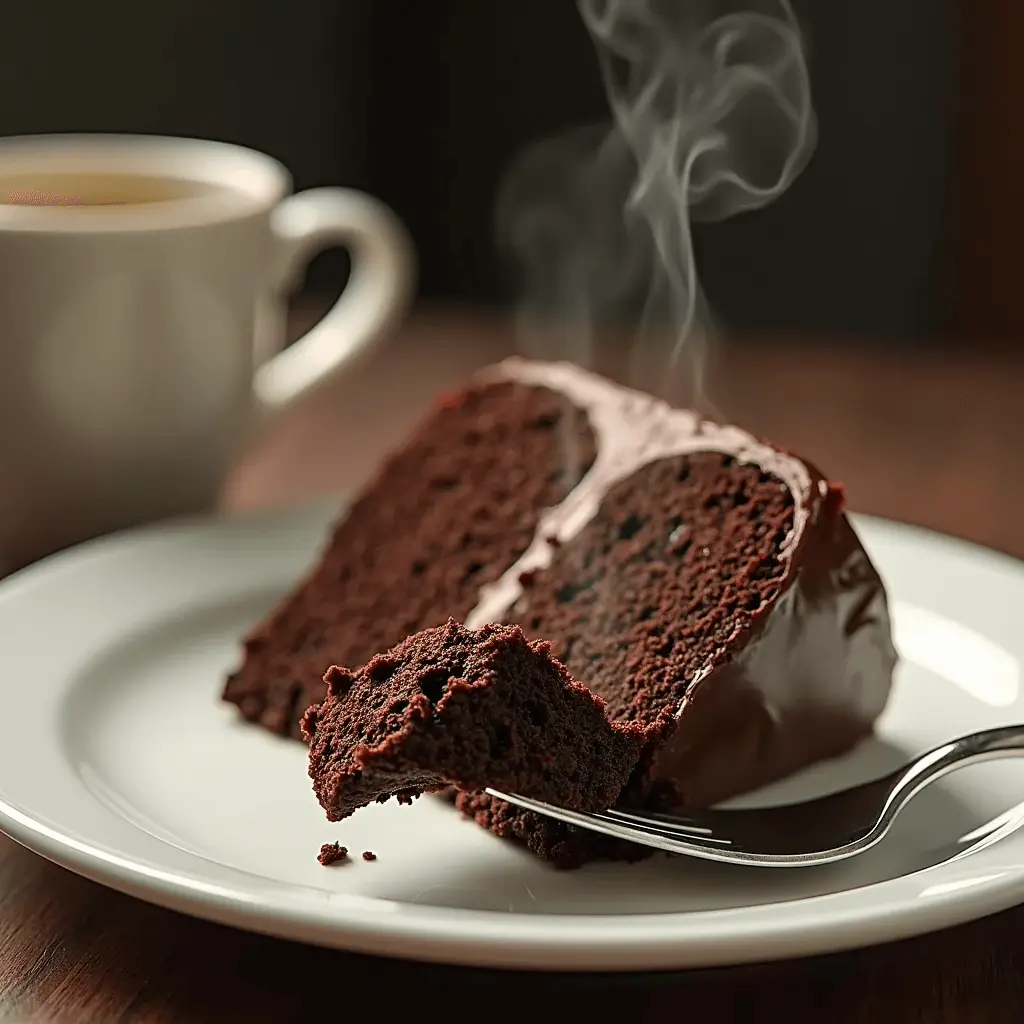
The moment I pulled my first successful gluten free chocolate cake from the oven, I nearly cried with joy. After countless failed attempts cakes that were too dense, too crumbly, or simply tasted “off” I had finally cracked the code. That rich chocolate aroma filled my kitchen as I watched the perfectly risen cake cool on my countertop, not sinking in the middle like all my previous attempts.
My journey to the perfect gluten free chocolate cake began when my daughter was diagnosed with celiac disease three years ago. As someone who had always expressed love through baking, I was devastated thinking she’d never enjoy a truly delicious birthday cake again. Those early gluten free baking attempts were disasters hockey pucks masquerading as cupcakes and cakes with the texture of sand.
But I refused to give up. Through countless experiments, consultations with pastry chefs, and deep dives into the science of gluten free baking, I discovered seven game changing secrets that transform a standard gluten free chocolate cake recipe into something extraordinary. The result? A chocolate cake so fluffy, moist, and decadent that no one and I mean no one can tell it’s gluten free.
What makes this gluten free chocolate cake recipe different from others you’ll find online? Most recipes simply substitute regular flour with a gluten free blend and call it a day. But achieving that perfect texture requires understanding how gluten free flours behave and compensating accordingly. My recipe incorporates specific techniques and ingredients that work together harmoniously to create a cake that rivals even the best traditional chocolate cakes.
Whether you’re new to gluten free baking or have been disappointed by dry, dense gluten free cakes in the past, these seven secrets will revolutionize your baking game. This isn’t just a gluten free chocolate cake it’s the best chocolate cake you’ll ever make, period and easy to make !
Why This Recipe Is a Must Try
Incredibly Fluffy Texture: The unique blend of flours and leavening agents creates a cake with an unbelievably light, airy crumb that defies gluten free expectations.
Moist For Days: While most gluten free cakes dry out within hours, this cake stays perfectly moist for up to 4 days thanks to a special ingredient combo.
Rich Chocolate Flavor: Double chocolate impact with both cocoa powder and melted chocolate creates depth of flavor that’s often missing in gluten free desserts.
No Gritty Texture: The specific flour blend and mixing technique eliminates the grittiness common in gluten free baked goods.
Beginner Friendly: Despite the professional results, this recipe is surprisingly straightforward with easy to follow steps.
Allergy Adaptable: This recipe can easily be made dairy free or gluten free. Easy substitutions make this cake work for multiple dietary restrictions beyond just gluten free.
Crowd Pleasing: Consistently receives the ultimate compliment: “I can’t believe this is gluten free!”
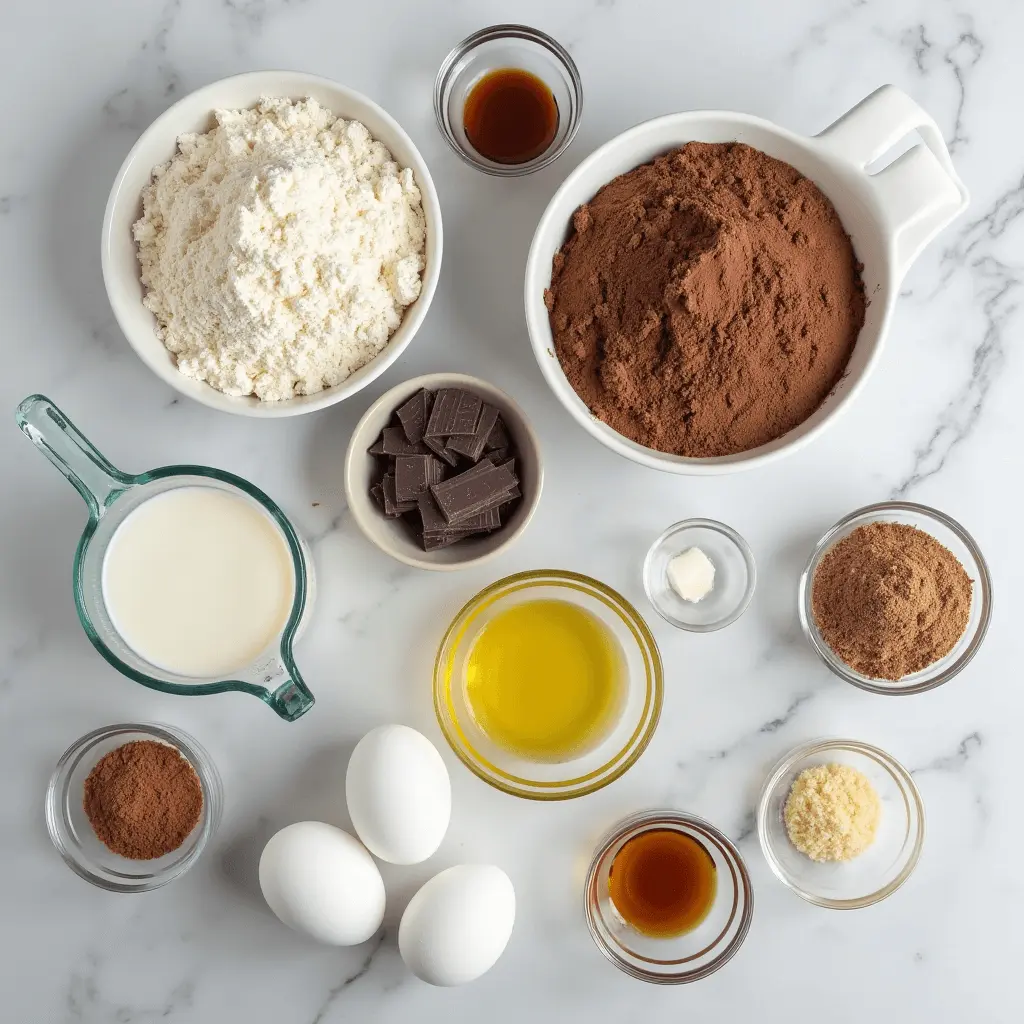
Ingredients Breakdown & Substitutions
Flour Blend
Why It’s Important: The foundation of any successful gluten free chocolate cake is the flour blend. My recipe uses a specific ratio of rice flour, tapioca starch, and potato starch for the perfect texture. Substitutions: Pre made gluten free flour blends can work, but choose ones without xanthan gum added. King Arthur Measure for Measure or Cup4Cup are good options for convenience.
Xanthan Gum
Why It’s Important: This replaces the binding properties of gluten, preventing your cake from crumbling apart. Substitutions: Psyllium husk powder (use 2 teaspoons instead of 1 teaspoon xanthan gum) or ground flaxseed (2 tablespoons mixed with 4 tablespoons hot water).
Dutch Process Cocoa Powder
Why It’s Important: Dutch process cocoa offers a smoother, deeper chocolate flavor than natural cocoa powder and works better with the pH levels of gluten free ingredients. Substitutions: Natural cocoa powder will work but add ¼ teaspoon baking soda to balance the acidity.
Melted Dark Chocolate
Why It’s Important: Adds richness and moisture that cocoa powder alone can’t provide, creating a depth of flavor that makes this cake special. Substitutions: Semi sweet chocolate chips or dairy free chocolate for a vegan version.
Buttermilk
Why It’s Important: The acidity in buttermilk activates the baking soda and helps create a tender crumb. Substitutions: Dairy free alternative: 1 cup non dairy milk + 1 tablespoon white vinegar or lemon juice (let sit for 5 minutes before using).
Oil (Instead of Butter)
Why It’s Important: Oil creates a moister cake than butter, especially important for gluten free baking which tends to dry out faster. Substitutions: Any neutral oil works canola, vegetable, or light olive oil. For added richness, try avocado oil.
Extra Eggs
Why It’s Important: Gluten free batters need more structure support than traditional recipes; eggs provide this while adding moisture. Substitutions: For egg allergies, try a combination of applesauce (¼ cup per egg) and an additional ½ teaspoon of baking powder.
Brown Sugar + White Sugar
Why It’s Important: The combination provides both moisture (from brown sugar’s molasses content) and proper structure. Substitutions: Coconut sugar can replace brown sugar for a less refined option. For a lower glycemic alternative, try allulose or monk fruit sweetener (though texture may vary slightly).
Step by Step Instructions with Expert Tips
Now let’s dive into the exact process that will transform these ingredients into the fluffiest gluten free chocolate cake you’ve ever tasted. Follow these steps precisely for guaranteed success!
- Preheat your oven to 350°F (175°C). Position a rack in the center of the oven. For even baking, check your oven temperature with an oven thermometer gluten free baked goods are more sensitive to temperature fluctuations.
- Prepare your cake pans. Grease two 8 inch round cake pans and line the bottoms with parchment paper. Then dust the sides lightly with gluten free flour or cocoa powder. This triple protection method ensures your cake releases perfectly every time.
- Combine your dry ingredients. In a large bowl, whisk together your gluten free flour blend, xanthan gum (if your blend doesn’t already contain it), cocoa powder, baking powder, baking soda, and salt. Whisk for at least 30 seconds to ensure your cake batter is well combined and even distribution. Proper aeration of dry ingredients is Secret #1 to a fluffy texture!
- Melt the chocolate properly. Place chopped dark chocolate in a microwave safe bowl and heat in 30 second intervals, stirring between each, until just melted. Stop heating when a few small pieces remain and stir until completely smooth overheating chocolate can make your cake bitter.
- Mix wet ingredients thoroughly. In a separate large bowl, whisk together the oil, white sugar, and brown sugar until well combined. Add eggs one at a time, beating well after each addition. Secret #2: This step incorporates crucial air bubbles for a lighter texture.
- Add flavor enhancers. Stir in vanilla extract and the melted chocolate into your wet ingredients. Secret #3: A touch of instant espresso powder (½ teaspoon) intensifies chocolate flavor without tasting like coffee.
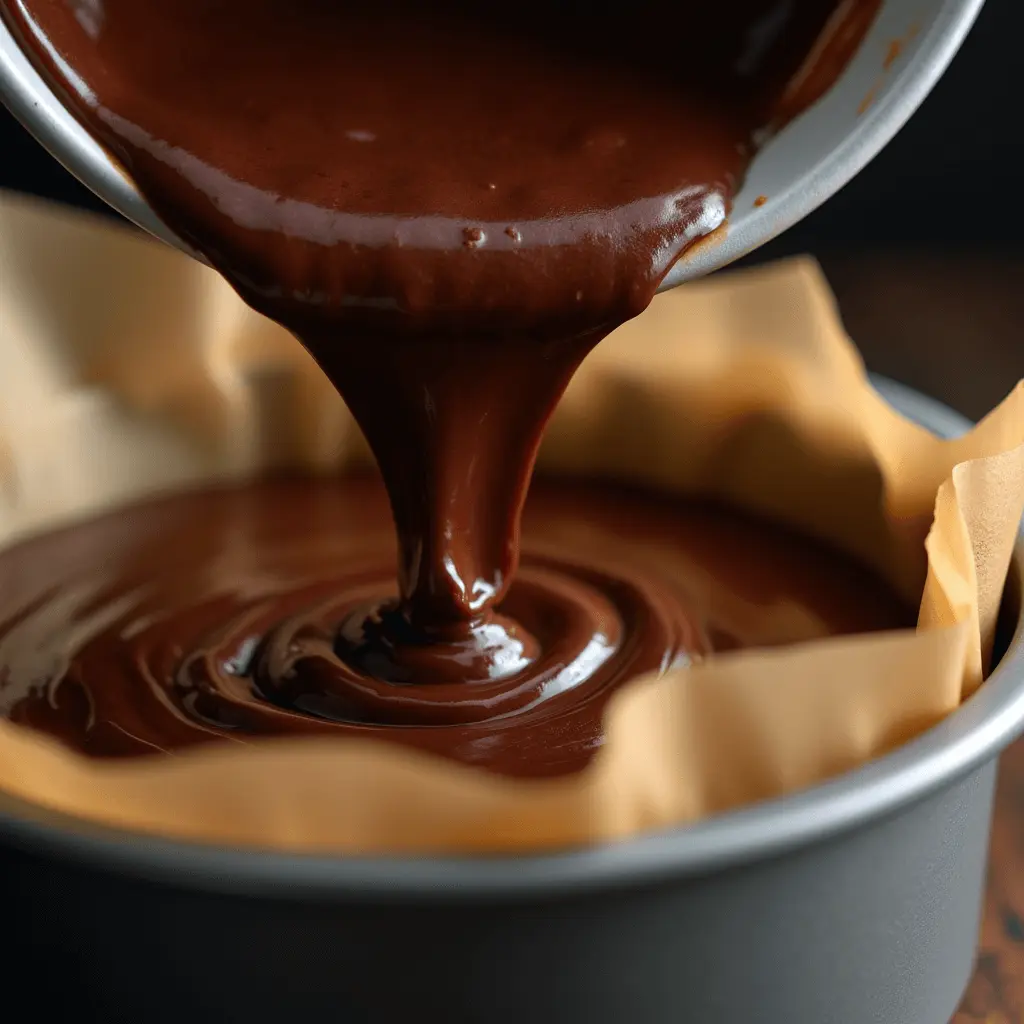
- Combine wet and dry mixtures. Add one third of the dry ingredients to the wet ingredients and mix gently. Then add half the buttermilk and mix. Repeat with another third of dry, remaining buttermilk, and finish with the final third of dry ingredients. Mix just until combined after each addition. Secret #4: This alternating method prevents overmixing, which can deflate your batter.
- Test the batter consistency. The batter should be thick but pourable, similar to a thick pancake batter. If it seems too thick, add 1-2 tablespoons of milk. If too thin, add 1 tablespoon of gluten free flour blend.
- Divide and conquer. Pour the batter evenly between the two prepared pans. Tap each pan gently on the counter 2-3 times to release any large air bubbles. Secret #5: Smooth the tops with an offset spatula for even layers.
- Bake with precision. Place pans in the preheated oven and bake for 28-32 minutes, or until a toothpick inserted in the center comes out with just a few moist crumbs. Do not open the oven during the first 25 minutes of baking. Secret #6: Adding a pan of water on the bottom rack creates steam that helps gluten free cakes rise higher.
- Cool strategically. Let cakes cool in pans for exactly 10 minutes no more, no less. Then run a knife around the edges and invert onto a cooling rack. Peel off parchment immediately and allow to cool completely. Secret #7: Flipping the cakes upside down while cooling creates a perfectly flat top.
- Frost only when completely cool. Wait at least 2 hours before frosting your cake. For best results, wrap each cooled layer in plastic wrap and refrigerate for 1 hour before frosting this makes the cake easier to work with and locks in moisture.
Troubleshooting Tips:
- If your cake sinks in the middle: Your oven temperature might be too high. Use an oven thermometer next time and reduce temperature by 25°F.
- If your cake is gummy: You likely undermixed the batter. Make sure all ingredients are well incorporated without overmixing.
- If your cake is crumbly: You might need more xanthan gum or egg for binding. Try adding an extra ¼ teaspoon xanthan gum next time.
- If your cake tastes gritty: Your gluten free flour blend might be the culprit. Try a finer milled flour or let your batter rest for 30 minutes before baking to allow the flours to hydrate.
Storage, Make Ahead, & Freezing Tips
Proper storage is crucial for maintaining the exceptional texture and moisture of your gluten free chocolate cake. Follow these guidelines to keep your cake tasting fresh for days:
Room Temperature Storage
- Unfrosted cake layers can be stored at room temperature, wrapped tightly in plastic wrap, for up to 2 days.
- Frosted cake can be stored under a inch cake dome or in an airtight container at room temperature for up to 3 days in cool weather. Place a slice of bread in the container to maintain moisture levels.
Refrigerator Storage
- Frosted cakes should be refrigerated in hot, humid weather. Cover loosely with plastic wrap or place in an airtight container for up to 5 days.
- Always bring refrigerated cake to room temperature (about 30 minutes on the counter) before serving for the best flavor and texture.
Freezing Instructions
- Unfrosted cake layers freeze beautifully, especially when topped with chocolate frosting. Wrap each layer individually in plastic wrap, then aluminum foil, and freeze for up to 3 months.
- Frosted cake slices can be frozen by placing them on a baking sheet until solid, then wrapping individually. These will keep for up to 1 month.
- Thaw frozen cake overnight in the refrigerator, then bring to room temperature before serving.
Reheating Tips
- Refresh slightly dry cake by placing a slice in the microwave next to a small cup of water for 10-15 seconds. The steam will rehydrate the cake without making it soggy.
- For a warm dessert experience, heat a slice for 10 seconds in the microwave, then top with a scoop of vanilla ice cream.
Using Leftovers
- Transform leftover cake into cake pops by crumbling it, mixing with a bit of frosting, rolling into balls, and dipping in melted chocolate.
- Create a quick chocolate trifle by layering cake cubes with whipped cream and berries.
- Make cake french toast by dipping thin slices in egg mixture and cooking on a griddle for a decadent breakfast.
Creative Variations & Serving Ideas
Once you’ve mastered the basic recipe, the sky’s the limit for customizing your gluten free chocolate cake! Here are some exciting variations to keep your baking adventures fresh and interesting:
Flavor Variations
- Mocha Chocolate Cake – Add 2 tablespoons of instant espresso powder to the dry ingredients for a coffee infused treat that enhances the chocolate flavor.
- Orange Chocolate Cake – Mix 1 tablespoon of orange zest into the batter and replace 2 tablespoons of the liquid with fresh orange juice for a bright citrus twist.
- Mexican Chocolate Cake – Add 1 teaspoon of cinnamon and a pinch of cayenne pepper to the dry ingredients for a spicy, warming flavor profile.
- Mint Chocolate Cake – Add ½ teaspoon of mint extract along with the vanilla for a refreshing combination.
Filling Ideas
- Raspberry Jam Layer – Spread a thin layer of seedless raspberry jam between cake layers for a fruity surprise.
- Salted Caramel Drizzle – Create pockets in your cake layers and fill with homemade salted caramel sauce.
- Peanut Butter Swirl adds a delightful twist to your prepared cake. – Drop spoonfuls of slightly warmed peanut butter onto each layer of batter and swirl with a knife before baking.
Topping & Frosting Inspiration
- Classic Chocolate Ganache – Simple, elegant, and intensely chocolatey.
- Cream Cheese Frosting pairs wonderfully with an easy gluten free chocolate cake. – The tanginess beautifully balances the rich chocolate cake.
- Whipped Chocolate Buttercream – For the ultimate chocolate lover’s dream cake.
- Fresh Berry Decoration – Top with seasonal berries for a pop of color and freshness.
Perfect Pairings
- Beverages: A cold glass of almond milk, hot coffee, or a dessert wine like port complements the chocolate flavors beautifully.
- Sides: Serve with fresh berries, a scoop of vanilla ice cream, or homemade whipped cream for an elevated dessert experience.
- Occasions: This cake is perfect for birthdays, dinner parties, or any gathering where you want to impress gluten free and gluten eating guests alike, especially with a delicious flourless chocolate option!
Nutrition Information
| Nutrient | Amount per Serving (1 slice) |
| Calories | 320 |
| Total Fat | 16g |
| Saturated Fat | 6g |
| Cholesterol | 55mg |
| Sodium | 280mg |
| Total Carbohydrates | 42g |
| Dietary Fiber | 3g |
| Sugars | 24g |
| Protein | 5g |
| Calcium | 8% DV |
| Iron | 15% DV |
Nutritional values are estimates only and may vary based on specific ingredients used. Serving size based on 12 slices per cake.
Expert Tips & FAQs
Expert Tips for Success
- Room temperature ingredients matter more with gluten free baking. Take eggs and dairy products out 30 minutes before starting.
- Measure flour by weight, not volume, for consistent results. A digital kitchen scale is the best investment for gluten free chocolate cake baking.
- Don’t substitute ingredients the first time you make this recipe. Once you understand how it works, then experiment with variations.
- Let the batter rest for 15-30 minutes before baking if time allows. This helps hydrate the gluten free flours for a better texture.
- Calibrate your oven temperature with an oven thermometer. Most ovens run 25°F higher or lower than the set temperature.
Frequently Asked Questions
Why did my gluten free chocolate cake sink in the middle?
This typically happens when there’s too much leavening agent, the oven temperature is too high, or the cake is underbaked. Make sure to measure baking powder and soda precisely, check your oven temperature with a thermometer, and test for doneness with a toothpick before removing from the oven.
Can I use just one type of gluten free flour instead of a blend?
No, a single gluten free flour won’t provide the right structure and texture. Different flours work together to mimic wheat’s properties starches provide structure, while whole grain flours add flavor and nutrition. If you don’t want to mix your own, use a high quality store bought blend that contains multiple flours and starches.
How do I prevent my gluten free chocolate cake from being gritty?
Use superfine rice flour in your blend, not regular rice flour. Let the batter rest before baking to allow the flours to fully hydrate. Finally, make sure you’re using a sufficient amount of liquid in the recipe gluten free flours absorb more moisture than wheat flour.
Can I make this cake dairy free as well?
Absolutely! Replace buttermilk with coconut milk plus 1 tablespoon of apple cider vinegar. Use dairy free chocolate and a dairy free frosting option. The texture may be slightly different, but still delicious.
How far in advance can I make this cake for a special occasion?
For the freshest result, bake the cake layers up to two days ahead, wrap well, and store at room temperature. Frost the day of or the day before your event. For longer storage, freeze unfrosted layers for up to three months.
Conclusion
There you have it the secrets to creating a gluten free chocolate cake that’s so fluffy, moist, and decadent that everyone at the table will be asking for seconds (and the recipe!). What started as a challenging journey to create a special treat for my daughter has turned into a fool proof method that’s brought joy to countless gluten free and non gluten free eaters alike.
The beauty of this recipe lies not just in its incredible texture and rich flavor, but in the fact that it empowers those with dietary restrictions to enjoy one of life’s greatest pleasures chocolate cake without compromise. Remember,gluten free chocolate cake baking isn’t about limitation; it’s about creativity and discovery!
Have you tried making gluten free chocolate cake before? What challenges did you face? I’d love to hear about your experiences in the comments below! Or if you try this recipe, please come back and let me know how it turned out for you and which variation you chose.
Don’t forget to subscribe to my newsletter for more tested and perfected gluten free recipes delivered straight to your inbox, and follow me on Instagram to see more gluten free chocolate cake baking inspiration and tips.
Happy baking, friends! Here’s to chocolate cake that everyone can enjoy!
2 thoughts on “7 Secrets to the Fluffiest Gluten Free Chocolate Cake Ever”
Comments are closed.